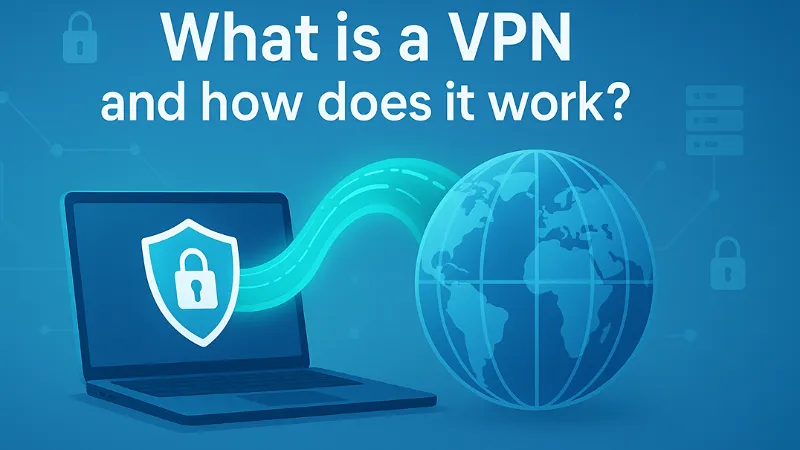
A secure internet connection is important for protecting your privacy online. Many people use a VPN (Virtual Private Network) to hide their browsing activity, encrypt traffic, and mask their IP address. However, even with a VPN, your data can still be exposed through a DNS leak, which silently sends your DNS queries outside the encrypted tunnel. This means your internet service provider (ISP) or other third parties can still monitor the websites you visit, track your location, and log your online activity. Understanding exactly what a DNS leak is, why it occurs, and how to fix it is important for maintaining true anonymity and ensuring your VPN is working as intended. By learning how DNS leaks work and following best practices to prevent them, you can strengthen your online security and protect your personal information from surveillance, data collection, and cyber threats.
What Is a DNS Leak?

DNS (Domain Name System) is often called the “phonebook of the internet.” Whenever you type a website address into your browser, DNS servers translate that domain into the correct IP address so your device can connect. Without DNS, navigating the web would require remembering complex strings of numbers rather than easy-to-read domain names.
A DNS leak occurs when these DNS requests do not travel through the secure VPN tunnel but are instead sent directly to your internet service provider (ISP) or another third-party DNS resolver. This means that even if your VPN is encrypting your traffic and masking your IP address, your browsing history can still be exposed at the DNS level. In practice, a DNS leak undermines the very reason people use VPNs – to keep their online activities private, secure, and anonymous.
it’s important to understand that DNS leaks are closely tied to online privacy, VPN security, and identity protection. Users searching for terms like “what is a DNS leak,” “DNS leak explained,” or “VPN DNS leak issue” are seeking clear definitions and risks explained in simple terms. Highlighting that DNS leaks reveal the websites you visit, your approximate location, and sometimes metadata about your online behavior makes the problem more tangible and relevant.
Why DNS Leaks Are Dangerous
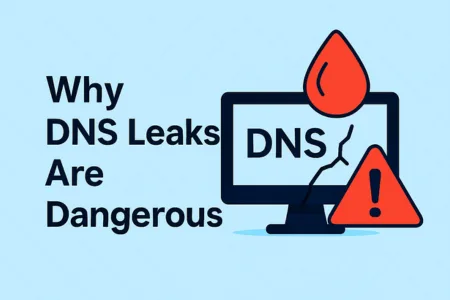
A DNS leak can undo the privacy and anonymity that a VPN is supposed to provide. When DNS queries escape outside the secure tunnel, they reveal sensitive information that can be exploited in different ways. Understanding these risks is critical for anyone concerned about digital security and online freedom.
- ISP Tracking and Logging – Your internet provider can still see every website you visit. Even if the actual content is encrypted, DNS requests show clear records of your browsing habits, which can be stored or sold to third parties.
- Location Exposure – DNS requests often contain information about your real geographical location. This can make it easy for websites, advertisers, or surveillance agencies to pinpoint where you are connecting from.
- Targeted Advertising and Profiling – Data brokers and advertisers can collect DNS query information to build detailed user profiles. This leads to invasive tracking, tailored ads, and loss of online privacy.
- Government Surveillance and Censorship – In countries with strict internet regulations, DNS leaks expose your activity to monitoring systems. This can result in blocked content, penalties, or legal risks for users trying to bypass restrictions.
- Cybersecurity Threats – Hackers or malicious actors who intercept DNS traffic can redirect you to fake websites (DNS spoofing), increasing the risk of phishing attacks and malware infections.
users often search for “why DNS leaks are dangerous,” “DNS privacy risks,” and “VPN DNS leak problems.” By explaining these dangers in clear terms, the content highlights the urgency of fixing leaks and reinforces the value of strong VPN security.
How to Test for a DNS Leak
Testing for a DNS leak is an important step to confirm whether your VPN is actually protecting your privacy. Many users assume that simply connecting to a VPN guarantees anonymity, but without running a DNS leak test, you may still be exposed. Search queries like “DNS leak test,” “check VPN leaks,” and “how to know if VPN is leaking DNS” are popular because users want quick, actionable steps to verify their protection.
Follow these steps to perform a reliable DNS leak test:
- Connect to Your VPN – Make sure your VPN connection is active and note the server location you selected (for example, New York or London). This will help you identify whether the DNS test reflects the VPN’s server or your ISP.
- Visit a DNS Leak Testing Tool – Go to a reputable site such as dnsleaktest.com, ipleak.net, or browserleaks.com/dns. These tools are widely used and display the DNS servers your system is currently using.
- Run Both Standard and Extended Tests – A standard test gives a quick snapshot, while an extended test runs multiple queries to reveal all servers that may be resolving your DNS requests. This ensures more accurate results.
- Compare the Results – If the DNS servers shown match your VPN provider’s servers or display locations consistent with your chosen VPN server, your connection is secure. If they show your ISP or unrelated servers, you are experiencing a DNS leak.
- Repeat Periodically – Run the test whenever you update your VPN client, switch devices, or connect to a new network to ensure ongoing protection.
Perform the test on different devices (desktop, mobile, and even router-level VPN connections) to make sure none of them are leaking DNS requests.
Common Reasons of DNS Leaks
Understanding the root causes of DNS leaks is important for troubleshooting and preventing them. Many users search for “common DNS leak issues,” “VPN leaking DNS causes,” or “why does my DNS leak” because leaks can originate from multiple system and network configurations. Here are the most frequent culprits:
- Default System DNS Settings – Operating systems like Windows, macOS, Android, and iOS often default to the DNS Servers provided by your ISP. If the VPN does not override these settings, your DNS requests may leak outside the secure tunnel.
- Transparent DNS Proxies by ISPs – Some internet providers force DNS traffic through their own servers, even if you have configured custom DNS. This practice, called a transparent DNS proxy, overrides your VPN or manual DNS settings.
- IPv6 Traffic Leaks – Many VPNs primarily handle IPv4 traffic. If IPv6 is enabled on your device but not fully supported by your VPN, those queries may bypass the VPN tunnel and leak to your ISP.
- Misconfigured or Outdated VPN Clients – Poorly configured VPN software, outdated apps, or incorrect firewall rules can allow DNS traffic to slip outside the encrypted connection.
- Manual Router or Network Settings – If your router is still set to use your ISP’s DNS, devices connected through it may leak DNS queries even while using a VPN.
- Split Tunneling Configurations – When VPN split tunneling is enabled, certain apps or traffic may bypass the VPN connection entirely, including DNS lookups.
addressing these causes helps capture search intent for terms like “VPN DNS leak Windows,” “DNS leak causes Mac,” or “ISP DNS hijacking.” Highlighting OS-specific and network-level issues ensures readers find practical explanations relevant to their situation.


How to Fix a DNS Leak

The good news is that DNS leaks can be fixed with a few adjustments. Many users search for “fix DNS leak,” “VPN DNS leak fix Windows,” or “how to stop DNS leaks on Mac/Android/iOS.” By following these platform-specific methods, you can strengthen your privacy and ensure your VPN is working correctly.
Use a Reliable VPN
Choose a VPN that offers built-in DNS leak protection and operates its own secure DNS servers. Premium VPNs are more likely to provide DNS leak prevention, automatic kill switches, and full IPv6 support.
Enable DNS Leak Protection in VPN Settings
Most modern VPN apps have a “DNS leak protection” or “Prevent DNS leaks” option. Turn this feature on to make sure all DNS requests are routed through the encrypted VPN tunnel. This setting is especially important on Windows and Android devices, which commonly default to ISP DNS.
Manually Set DNS Servers
If your VPN does not automatically change your DNS, you can manually configure secure DNS servers:
- Cloudflare DNS (1.1.1.1, 1.0.0.1)
- Google Public DNS (8.8.8.8, 8.8.4.4)
- OpenDNS (208.67.222.222, 208.67.220.220)
On Windows: Adjust network adapter settings.
On macOS: Change DNS under Network Preferences.
On Android/iOS: Set custom DNS in Wi-Fi or mobile network options.
On Routers: Configure DNS manually so all devices use secure resolvers.
Disable IPv6 (If Unsupported by Your VPN)
Some VPNs do not fully support IPv6 traffic, which can cause DNS requests to leak. Disable IPv6 on your device or router if your VPN cannot handle it securely.
Use DNS Over HTTPS (DoH) or DNS Over TLS (DoT)
Where supported, enable DoH or DoT in your browser (e.g., Firefox, Chrome, Edge) or operating system to encrypt DNS queries in addition to your VPN tunnel.
Regularly Test for Leaks
After making these changes, run DNS leak tests frequently—especially after VPN updates, OS upgrades, or when connecting to new networks. This ensures your settings remain effective.
By combining these fixes, you can effectively stop DNS leaks across all major platforms and keep your browsing activity private.